Printers may be on the way out, given the rise of digital file sharing, but they’re unlikely to go away completely any time soon. Thankfully, you don’t need a computer to print files. Instead, you can do it straight from your smartphone. That’s why we’ve put together this guide to help you learn how to print files straight from your Android phone.
There are a number of ways to print files from your Android phone. Not only has Android itself gotten better at printing, but the best inkjet and best photo printers have been getting new features to accommodate wireless printing. In case you need to print from your iPhone or iPad, check out our other guide. For this guide, we’re focusing on Android devices.
How to print a file on Android
Step 1: Find the file you want to print. You can print from Files, Google Docs, Google Sheets, or a number of apps that support printing. We’ll be using Files, but the instructions are similar across a number of apps.
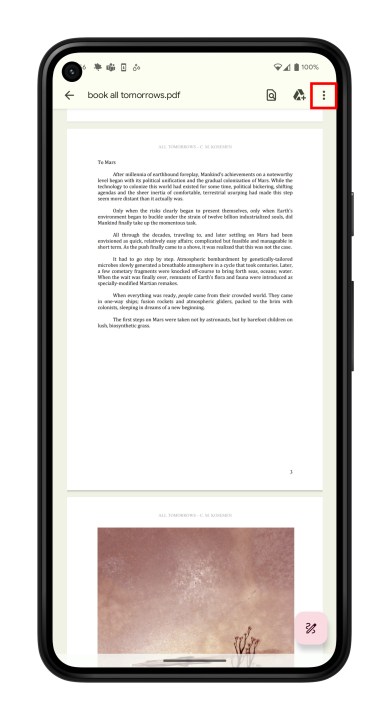
Step 2: Open the file and select the three vertical dots in the top-right corner.
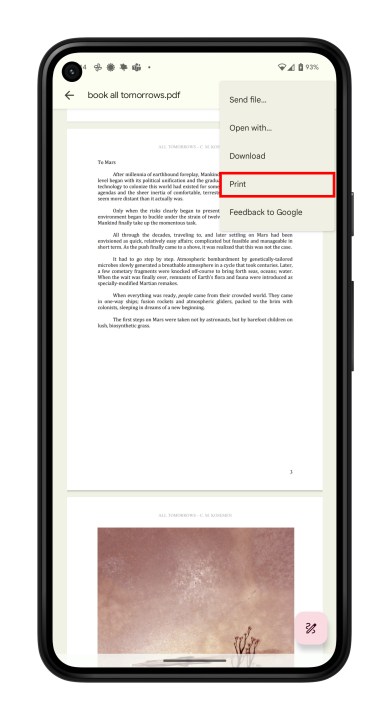
Step 3: Choose Print from the list.
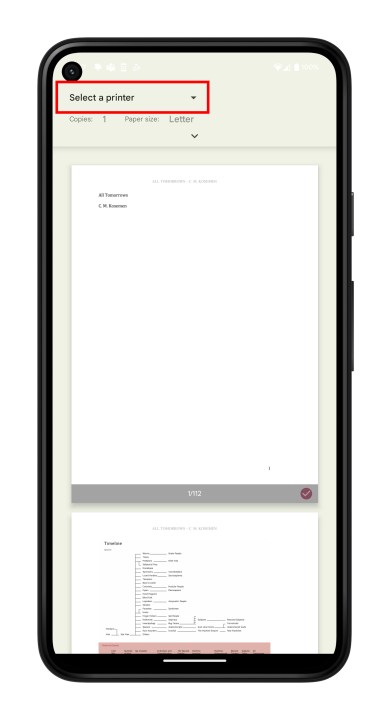
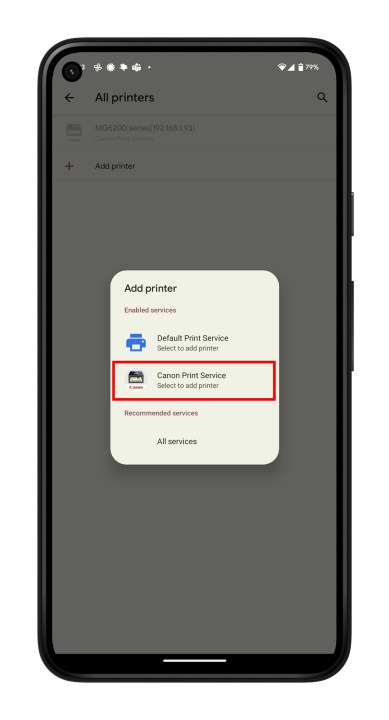
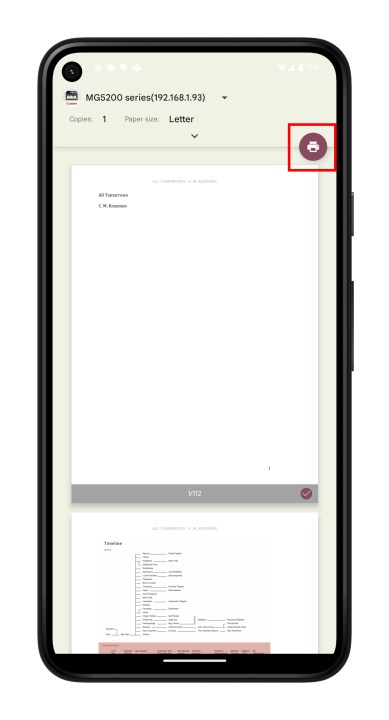
Step 4: Your printer should be visible at the top of the page. If it isn’t, choose Select a printer and choose All printers > Add printer. We have a more in-depth guide to adding printers below.
Step 5: Choose your printer’s print service. The process will check your Wi-Fi network and find your printer.
Step 6: Go back to the printing page and choose the Print button.
How to print a web page on Android
You don’t have to download something to print it out, though. Instead, you can just print straight from the internet. You can do this on basically any smartphone or tablet browser, and the process is largely the same. We’ve used Chrome for this guide.
Step 1: Open Chrome and head to the webpage you want to print.
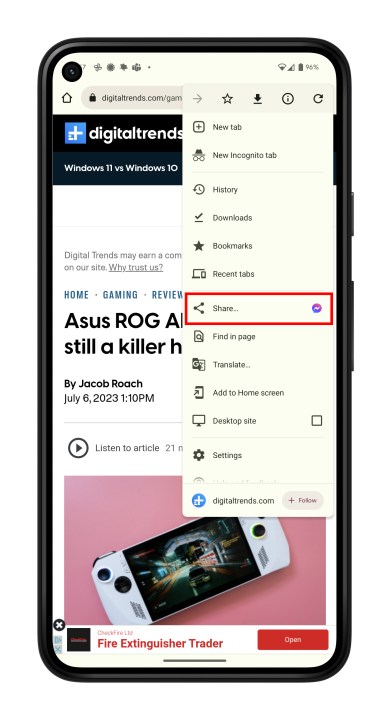
Step 2: Open the three-dot menu in the top-right and choose Share.
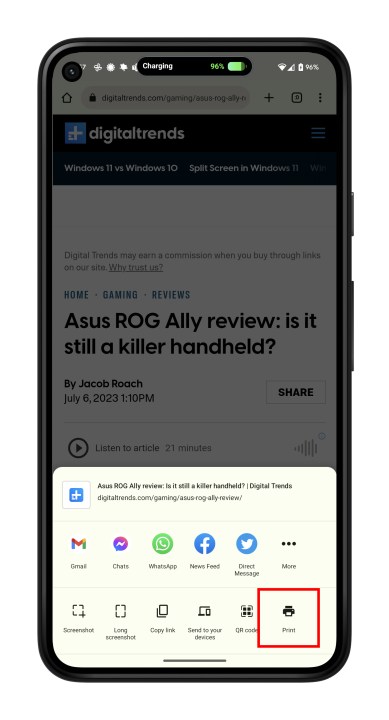
Step 3: Now select Print.
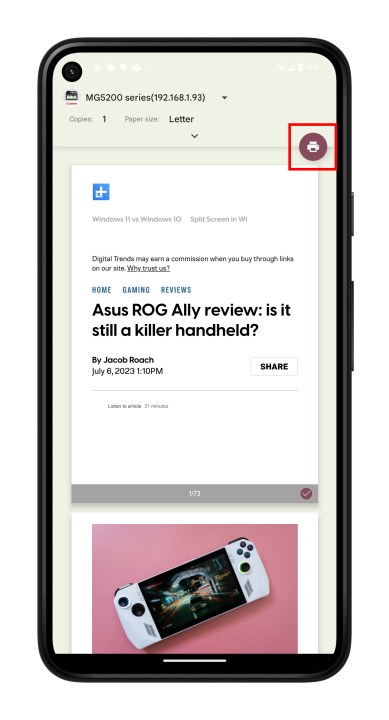
Step 4: Select your printer, and tap the Print button. Once again, if you don’t see it, follow the steps in the section below to add a printer to your Android phone.
How to setup a printer on Android devices
If you don’t see your printer when you try to printer using the steps above, you’ll have to add it first. Here’s what to do:
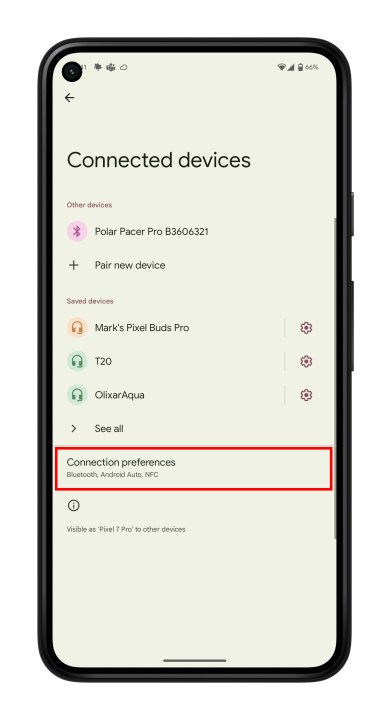
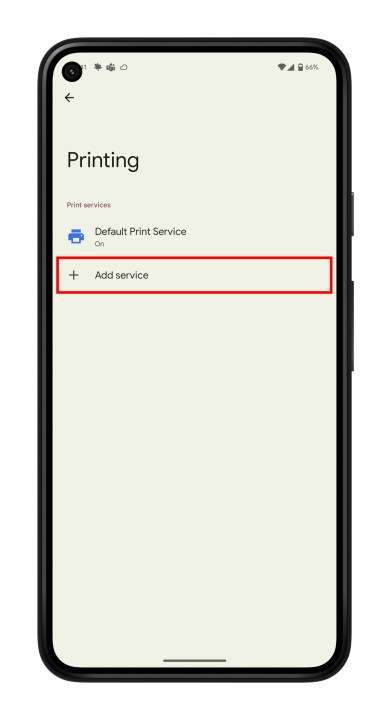
Step 1: Head to Settings > Connected devices > Connection preferences > Printing.
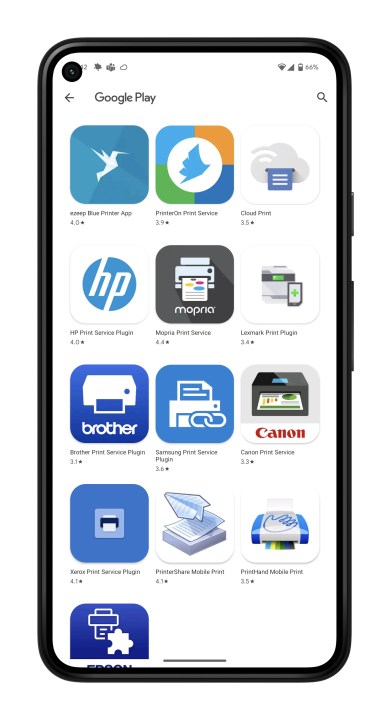
Step 2: Select Add service. The Google Play Store will open.
Step 3: Choose your printer’s brand and Install the app.
How to print using email on Android
Lately, some of the best printers have been getting email addresses. What that means is that you can send an email to the printer with a document you want to print, and it will automatically print it. Setting this up varies from manufacturer to manufacturer, so if you’re having trouble, we recommend looking at the manual for your printer or getting in touch with the manufacturer.
Also, we’re using Gmail as an example here, and other email clients may have a slightly different process or interface. The process should be fairly similar, though.
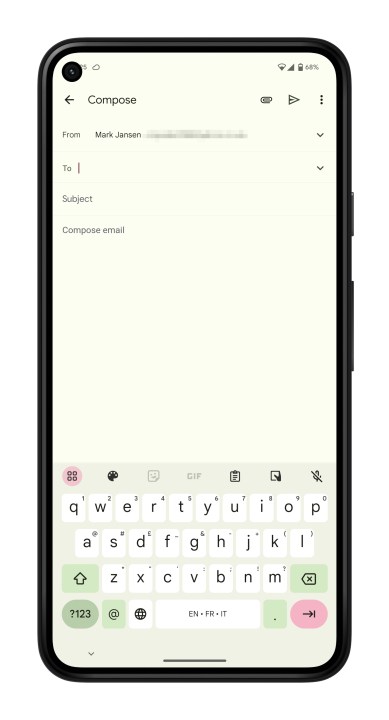
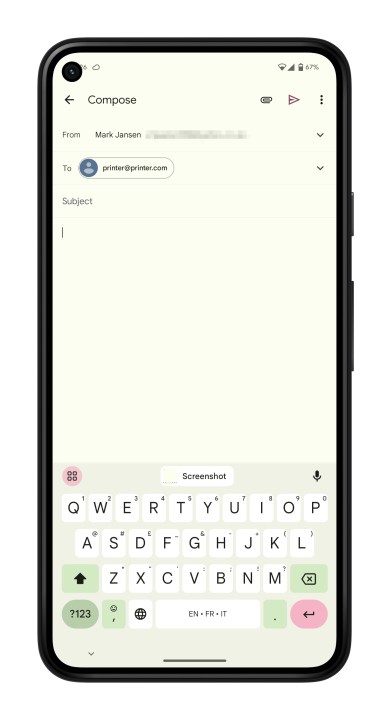
Step 1: Open your preferred email client and create a new email.
Step 2: Enter the printer’s email address in the To field.
Step 3: Choose the Attach button. This may look like a paperclip or some other icon, depending on your email client.
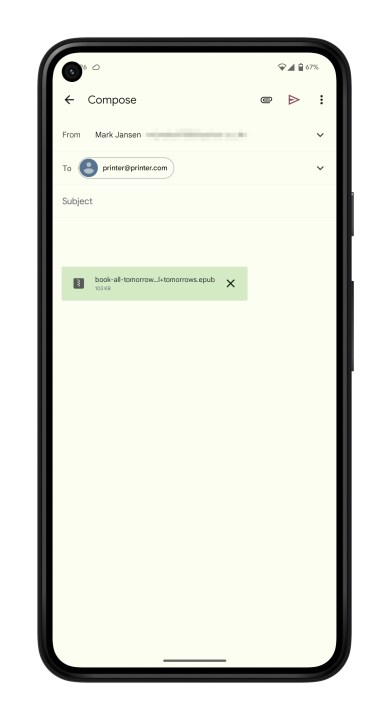
Step 4: Navigate to the file you want to print. It may be located in the default Files app on your phone, Google Drive, Google Photos, or a third-party app. You’ll need to know where it’s located to attach it and print it.
Step 5: Once the file has been attached, select the Send button.
You can also start this from a slightly different way, by sending the file to your email client directly from an app.
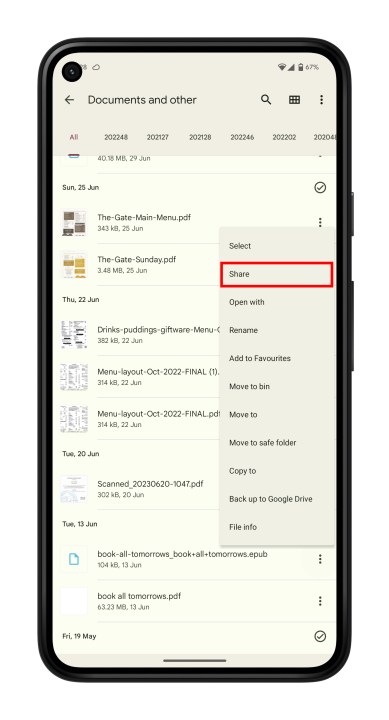
Step 1: Find and open the image or file you want to print. You can do so by navigating to the Files app, Google Photos, Google Drive, or a third-party app.
Step 2: Select the three dots next to the file and then the Share button. Alternatively, you may need to Send a copy in some apps, like in Google Docs.
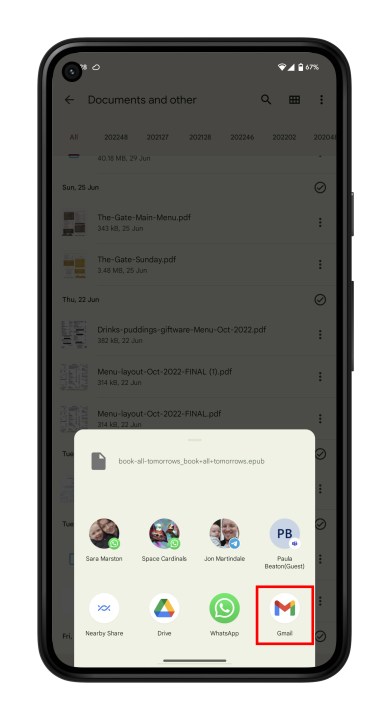
Step 3: Find your preferred email client and select the icon.
Step 4: Enter the printer’s email address in the To field and tap Send.
Editors’ Recommendations


